In this article, “Priyanka Jhamnani” shares the complete step-by-step process and benefits of migrating an E-commerce website to Shopify. Want to establish your eCommerce online store using the Shopify platform? EbizON Digital offers the best Shopify migration and development services. Our Shopify website development services have got you covered. So, let’s make your Shopify online store a success together!
Migrating your ecommerce store to Shopify has many benefits. Perhaps you want to access all the wonderful Shopify apps and integrations that many tools offer for Shopify.
Or, perhaps you are tired of the platform you are currently using, finding it slow, hard to use, and not optimal for success. Regardless of your reason for migrating to Shopify, the migration process can seem daunting, complicated, and confusing.
However, it doesn’t have to be that way. This article will go over all the things you need to migrate your website to Shopify.
Shopify Migration Checklist
Use this checklist to ensure you don’t forget anything when migrating to Shopify.
1. Sign Up For A Shopify Plan
 Before you can get started with the migration process, you need to have a Shopify plan. There are several Shopify plans, so make sure you get the one that is right for your needs.
Here are your options:
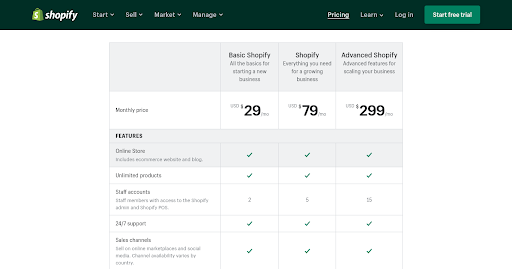
- Basic Shopify: This plan is best for small businesses. You can only have two staff accounts. Some features will also be missing, such as professional reports and the ability to show calculated third party shipping rates at checkout. You also can’t sell in multiple languages. In addition, you will have more transaction fees and lower shipping discounts. This plan costs $29/month.
- Shopify: This is for small and medium sized businesses that have more needs. It costs $79/month, so it is more expensive than Basic Shopify. You can have five staff accounts, and you will get professional reports. It is best for those who want to sell globally, as you can sell in two languages and create international domains.
- Advanced Shopify: This is for larger businesses. It is expensive, at $299/month. You can have up to 15 staff accounts, so it is best for companies with big teams.
Although these are your main options, there are two more options as well:

- Shopify Lite: This probably won’t fit your needs, as it only allows you to sell via a Shopify button on your website; you can’t set up an online store.
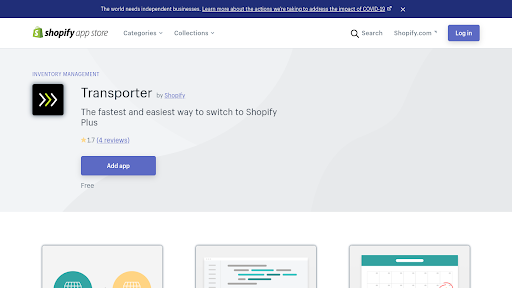
- Shopify Plus: This is the most expensive Shopify plan — it costs a whopping $2,000 a month! That is a lot of money, so it is only for huge businesses that can afford that kind of pricing. However, it does have its benefits, such as a 60 percent faster checkout, built in AR and 3D on product pages, and more. Shopify won’t take care of the migration for you, even if you have Shopify Plus, but you will be able to use the Transporter tool (more on that later).
2. Choose Your Sales Channels
 Shopify lets you set up an online store, but it also allows you to do a lot more than that. Regardless of which plan you get, it is crucial to understand that you can sell on other channels as well.
With Shopify, you can sell on Facebook, Facebook Messenger, and Instagram. You can also put a buy button on any blog or website, including WordPress blogs.
Also, you can choose to use Shopify POS (Point of Sale). This allows you to sell in person, at retail stores and events, and accept payments through the Shopify app.
If you use this feature a lot, you can sign up for Shopify POS Pro. However, this costs $89/month, so if you are only selling in person occasionally, Shopify POS Lite should be enough for you.
3. Make A List Of The Data You Will Be Migrating
Before you can start the migration process, it is essential first to make a list of the data you will be gathering. The more data you want to migrate, the more complicated the process will be and the longer it will take.
Of course, you will have to migrate your products, along with their descriptions, images, titles, etc. However, it would be best if you also migrate product reviews.
You will also need to migrate customer information. Not only that, but you will want to migrate your order history as well.
In addition to all that, you will need to migrate data such as discount codes, certificates, store credits, gift cards, etc., so customers can continue to use the discounts you made available to them.
Finally, you will need to migrate all of your content, including blog posts and pages such as the About Us page and the Shipping Policy page.
That is a lot of data! I would recommend making a list of all the data sets you will need to migrate.
This way, you can go on to the next step, which is deciding which migration method you will be using — you can only transfer certain data via specific methods.
4. Choose Your Migration Method
 There are quite a few methods you can use to transfer all that data. Some are better than others, and some are cheaper but will take quite a long time.
I will go over your available options in this section. I will also help you decide which option is best for you.
However, I do want to mention that your best bet is to hire Shopify migration experts. Transferring all the data yourself might save you some money, but it can take a lot of time — it is a long process.
If you need to get your Shopify site up and running right away, a migration service is the best way to do it without any disruptions to your customers. The cost will usually depend on the amount of data you are transferring, so the price won’t even be that high if you operate a smaller store.
Here are your other options for transferring your data:
- Copy and paste: This is the most straightforward method, and it also is entirely free. However, there is a limit to what you can copy and paste. Also, this will take forever.
- CSV files: You can use CSV files to transfer SOME data. You can move products with this method, and you can also transfer most customer data — but you will not be able to transfer customer passwords, which means all customers will have to reset their passwords and create new logins. This can be quite inconvenient for them.
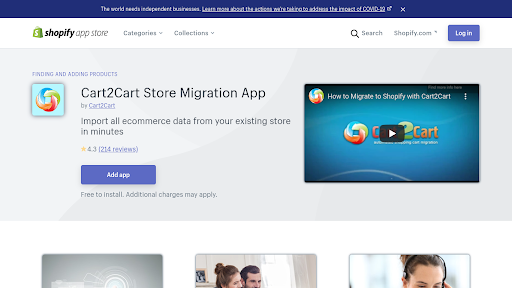
- Use a migration app: There are several migration apps in the Shopify app store. Cart2Cart Store Migration is one such app. If you need to migrate your Etsy data, you can use an app like Etsy Migration — Auto Import. Conduct a search in the app store, check pricing, and read reviews to make sure you choose a useful app that will transfer ALL your data and not leave anything out.
- Create an API app: You can also create an app that uses the Admin API to transfer your data. You will need technical knowledge if you will do this yourself. You can use APIs to transfer gift cards, product data, customer data, blogs, and more.
Make sure to migrate your products first. Only after all your products are migrated should you migrate your customer data, and only after that is done should you migrate your historical orders.
 If you are a Shopify Plus member (which costs $2,000/month, as mentioned), you have two more options available:
- Use the Transporter App: You can import customer data, product data, and historical orders with this tool. You MUST be a Shopify Plus merchant to use this tool; if you are, you can get it in the Shopify App Store.
- Use the Transporter Command Line tool: This tool allows you to convert data from your existing store into a format supported by the Transporter App. It is open-source and available from Github. The use of this tool requires some technical knowledge.
5. Review and Organize Your Data
Before you go ahead with choosing a theme and customizing your new Shopify site, it is crucial to make sure all your data was imported correctly. Review all your data to make sure everything is there.
Here is a basic checklist of the data you should check (depending on your store, it might be more):
- Product data
- Order history
- Customer data
- Gift cards and discount codes
- Blog Posts
6. Set Up Redirects
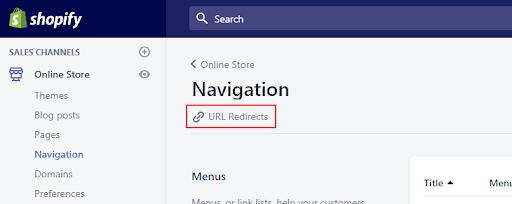 Setting up redirects is a critical step that many people forget to do. If your site has a new domain name or individual pages are on different URLs, you MUST create redirects to your new site.
Otherwise, customers who are used to your old site name won’t find your new store.
Unfortunately, many business owners migrate to Shopify and then find that their traffic decreases. The reason for this is simple but often overlooked — they did not set up redirects to their new site, so they lost old customers who thought their site got taken down.
There may be hundreds or even thousands of redirects to make, depending on the size of your site. A Shopify Development Agency will make sure that redirects are set up to all your pages.
7. Set Up Google Search Console And Resubmit A Site Map
 If you are creating new URLs, it is vital to reindex your site on Google. Your old sitemap might be inaccurate — submitting a new sitemap will help Google crawl your site quickly and index your pages, so they show up in the Google search results.
Many Shopify apps will allow you to create a sitemap. Site Robot is one of them — it has a seven day free trial.
Once you generate a sitemap, submit it in the Google Search Console. If you have Bing Webmaster set up — and you should, as Bing and Yahoo still account for a small but sizable chunk of traffic — submit your sitemap in Bing Webmaster as well.
 What if you moved your entire site to a new domain? In that case, you can use the Change of Address Tool in the Google Search Console.
Using this tool will let Google know that you moved your site. It will help you retain your old site’s SEO value and ranking — otherwise, you risk losing all of it.
8. Send Out Password Resets
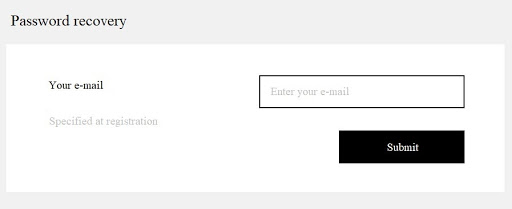 Sending out password rests is another critical step. It might not be necessary if you imported all of your customers’ password login information.
However, it still might be a good idea, just to make sure that everyone can log in.
If you were not able to import customer passwords because you used a migrational method such as importing CSV files, this is a crucial step. You will need to send out a bulk password reset to all your customers at once.
9. Choose A Payment Provider
 There are several ways to accept payments on Shopify. The easiest way to accept payments is to use Shopify Payments.
However, Shopify Payments is only available in certain countries, so make sure you can use it. If not, there are other options available.
Shopify Payments is easy to use because you can access it as soon as you set up a Shopify Store. You also can avoid paying extra fees, and you can see all your transactions in the Shopify Admin.
You can accept payment methods such as Visa, Mastercard, Discover, and many more with Shopify payments. However, certain businesses are prohibited from using it, though this depends on your country.
Fees will also vary based on country. To learn more about whether you will be eligible for Shopify payments, how to get started, what you will have to pay in fees, and more, go to this page.
Another option is to use a third party payment provider. There are over 100 available, and you can get it set up in the Payments section in your Shopify admin.
 There are also some apps you might want to use that are related to payments. Here are some of them:
- PayWhirl Recurring Payments: This app allows you to sell subscriptions and create payment plans for customers.
- Conekta Offline Payments: You can access payment in cash, offline, with this app.
- Split – Partial Payments: This app allows customers to split their payments or share them with a friend.
- Affirm: This is a popular app that allows customers to pay over time, in installments. A quick soft credit check (that does not impact their credit score) will be made instantly to see if a customer qualifies for this option.
10. Choose A Theme
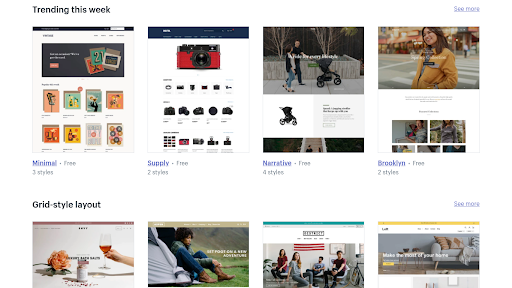 Once you have figured out how you will migrate all your data and have completed the process, it is time to choose your website’s theme.
You have two options: A free theme or a paid theme. A free theme has the advantage that it is free, but this is precisely why many others will use it as well.
As such, it is harder to stand out. On the other hand, a premium theme will help your site be unique and allow you to access special features.
Premium themes are available in the Shopify Theme Store. However, many third party sellers sell premium themes, as well.
If you are hiring a Shopify Development agency for the migration process, they can help you find a theme that fits your needs and which looks great.
11. Customize Your Store
Once you have downloaded a theme, it is essential to customize it, especially if you have a free theme. Each theme will have different customization options.
In addition, you might want to consider organizing your products into collections, as this will help make your site easier to navigate — customers will be able to find what they are looking for quicker. You should also customize your menu and make it easier to navigate.
12. Create A Blog
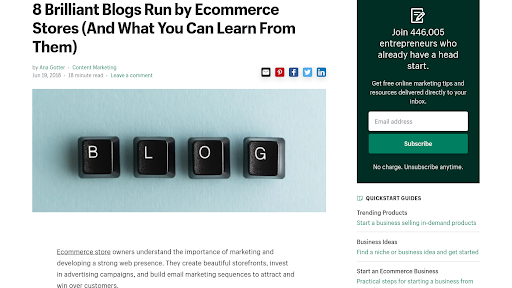 If you already had a blog, I’m sure you imported it to your new site. However, if you did not already have a blog, you might as well make one now that you are overhauling your site anyway.
There are many benefits to blogging. First and foremost, you will be able to boost your site’s SEO value.
Google values sites that offers valuable, informational content. Without a blog, all you have is products — and although they can rank by themselves, a blog will boost your site’s overall Domain Authority to the point that your product pages will rank higher.
Of course, people will also be able to find your blog when searching on Google for answers to questions that are answered on your blog.
You will also get more repeat customers — people might come back to visit your blog and see what is new, or they might sign up for your newsletter to get your latest tips and information. Such a newsletter is handy as it allows you to sprinkle in product promotions as well.
You can see some great ecommerce blog examples here.
13. Choose Your Apps
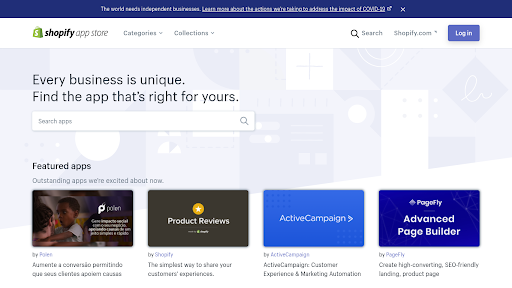 One of the main reasons to migrate to Shopify is the wide availability of apps in the app store. As such, once you have all your data migrated and have customized your store to your liking, it is time to choose which apps you will use.
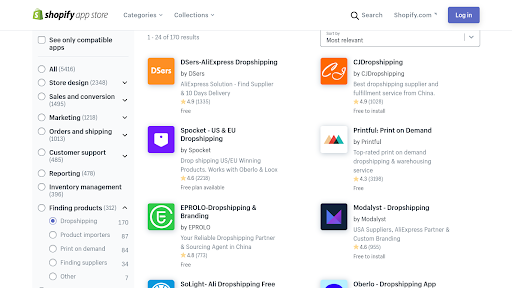
The Shopify App Store has thousands of apps available, in all categories. Some are premium apps, but many — if not most — are either free or have a free version or free trial available.
Here are some of the best apps in the Shopify app store, across several categories, that you might want to use:
- CJ Dropshipping: This app will help you find products to dropship.
- Printful: Printful is a print on demand provider, allowing you to sell products on demand without owning any stock.
- Pagefly Landing Page Builder: Create landing pages with ease.
- Privy: An all in one tool for your email marketing, pop ups, and SMS marketing needs.
- PushOwl: Send push web notifications.
- Abandoned Cart Recovery: Send email reminders for free when customers abandon their carts.
- SEO Booster: Optimize your Shopify site’s SEO for more traffic.
- Ultimate Sales Boost: Insert countdown timers to increase conversions.
- Bundler: Cross sell products with bundles to increase sales.
- Omnisend: An all in one app for email and SMS marketing campaigns.
- Secomapp Affiliate Marketing: Create an influencer or affiliate program to boost sales through affiliates.
- EzySlips: Integrate with Fedex and other shipping providers for your shipping and return management needs.
- Easy Digital Products: Sell digital products, such as art and ebooks, and make it easy for people to access their digital purchases.
- Vertex Help Center: Create a FAQs page and allow people to create support tickets.
- Whatsapp Chat + Abandoned Cart: Allow people to contact you via Whatsapp.
There are so many other free apps out there for so many categories. Just go to the App Store and search by category or use the search bar to find what you are looking for.
To Summarize: The Complete Shopify Migration Checklist
Here is the complete Shopify Migration Checklist:
- Sign up for a Shopify plan.
- Understand where you will sell — which sales channels you will be using.
- Create a list of the data sets you will be transferring to your new site.
- Understand the different migration methods, and use the one that best suits you.
- After migrating your data, double check to ensure everything was correctly transferred.
- Set up redirects for all pages, if necessary.
- Set up your Google Search Console and Bing Webmaster Tools accounts for your new site. Use the Google Change of Address tool. Create a sitemap of your new site and submit it to Google and Bing. Get Google Analytics set up.
- Send out bulk password rests, if necessary.
- Choose a payment provider and set up payments.
- Choose a free or paid theme.
- Customize your site.
- Create a blog if you have not imported one from your old store.
- Download free and paid apps from the Shopify App Store.
Wrapping It Up
Migrating your site can be a hassle — there is no doubt about it. In a sense, it is like moving to a new house — there are so many things to get used to, from the interface to the apps to the way your site will look.
However, the benefits of moving to Shopify are many. I hope this checklist will help you stay organized while you migrate your site.